The habits: ten rules that keep every case clean
Answers: what are the rules that keep a case clean? where do I click for each one? when do I click Mark Complete? how do I give a task to someone else? what do I look at on Monday morning?
These came out of building and testing your cases. Each one prevents a real problem we saw. Where a habit needs a click, it says where.
1. Send the range from pdrOS only
Never also send RTAflow's range and payment links. Otherwise the customer gets two sets of payment links and two invoices.
- In the left menu, click Contacts.
- Click in the search box at the top of the list and type the customer's last name or RO number (your case number).
- Click the customer's name in the list. Their contact profile opens. You are in the right place when you see the customer's name at the top left and their texts in the middle.
- On the left side of the contact profile, scroll down to the folder CASE and click the folder's name to open it.
- Check that Range low, Range high and Carrier's offer are filled.
- Look at the top of the folder. Send range comes right after Case status, the first field.
- Click the box under Send range and pick Send it now.
- Click the blue Save button at the bottom of the left side.
2. A total loss is Insured
Claim side must be Insured on every total loss and Claimant on every diminished value. The demand that goes out depends on it. (On an inspection you take on, pdrOS sets Claimant itself.)
- In the left menu, click Contacts.
- Click in the search box at the top of the list and type the customer's last name or RO number.
- Click the customer's name in the list. Their contact profile opens. You are in the right place when you see the customer's name at the top left and their texts in the middle.
- On the left side of the contact profile, scroll down to the folder CASE and click the folder's name to open it.
- Find Claim side.
- Click the box under Claim side and pick Insured (a total loss) or Claimant (a diminished value).
- Click the blue Save button at the bottom of the left side.
3. Customers text the 610 number
Give it on every call. Texts to your cell are not on the customer's contact profile, and Sarah cannot see them.
4. Ask consent on the call
You fill the signup form with the customer on the phone.
- Open your signup link (your Signup bookmark; see Your three links).
- Fill the form with the customer as you talk.
- Near the end, find the consent box I agree to receive text messages about my case from this office. Reply STOP to opt out.
- Ask "OK to text you updates?".
- Yes: check the box. It records their permission on the case and on the signup PDF.
- No: leave the box empty.
- Click Submit.
- If they said no, stop their texts straight away: in the left menu, click Contacts. Click in the search box at the top of the list and type the customer's last name. Click their name. At the top of the left side, click the DND tab (next to All fields) and check Text Messages. It saves by itself.
- Then tell us the RO number (in the left menu, click Support, then the orange Support Ticket button); we keep that customer on email only.
5. Use the link in the task or the alert, never a plain signup link
This is for a referred customer or a stranger who texted. The plain link makes a second contact profile for the same person.
From a task:
- In the left menu, click Tasks. My Tasks opens. You are in the right place when you see the boxes Overdue, Due Today, This Week and Completed at the top.
- Click the task's row (for example Call the referred customer). A short preview opens under it.
- Click Open Full View.
- Click the signup link written in the task. (The link under WHERE is a different one: it opens the contact profile.)
From an alert on your phone: tap the signup link in the text.
6. Book from the contact profile, never type a name into Calendars
The Appointments icon on the contact profile books onto the right customer. Typing a name in Calendars makes a second customer with no case.
- In the left menu, click Contacts.
- Click in the search box at the top of the list and type the customer's last name or RO number.
- Click the customer's name in the list. Their contact profile opens. You are in the right place when you see the customer's name at the top left and their texts in the middle.
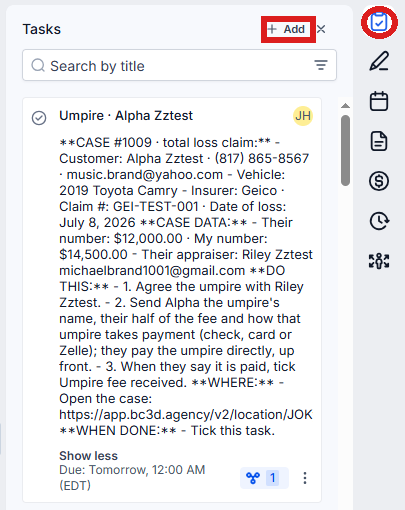
- On the far right edge of the contact profile, click the Appointments icon (a calendar). You are in the right place when the panel's title reads Appointments.
- Click + Add at the top of the panel. A small menu opens; click Meetings. The Book appointment window opens.
- Under Calendar, make sure it reads Inspections Calendar (if not, click the box and pick it).
- Under Date & time, click the box under Date and pick the day, then the box under Slot and pick a free time.
- Click the blue Book appointment button at the bottom right.
7. After a "Not sent", fix the field, wait one minute, then send again
If you pick Send it now again within seconds of a Not sent, pdrOS can miss it. You would get the "did not go" text after five minutes and lose those five minutes.
- In the left menu, click Tasks. My Tasks opens. You are in the right place when you see the boxes Overdue, Due Today, This Week and Completed at the top.
- Click the row of the task that came with the Not sent (a ⚠️ task, or A Send switch could not act). A short preview opens under it.
- Click Open Full View. Read which field is missing.
- Click the link under WHERE. The customer's contact profile opens in a new browser tab. You are in the right place when you see the customer's name at the top left and their texts in the middle.
- On the left side, click in the search box at the top (it reads Search fields and folders) and type the missing field's name.
- Fill the field. An amount or an email: click in the box and type it. A PDF: click Click to upload, pick the PDF and click Open.
- Click the blue Save button at the bottom of the left side.
- Wait one minute.
- Click in the search box at the top of the left side and delete what is there.
- Type the switch's name (for example Send demand).
- Click the box under the switch and pick Send it now.
- Click the blue Save button at the bottom of the left side.
8. Read the other side's conversation after a send
The email that went is kept there, and their reply lands there too. Your phone tells you when it does.
- In the left menu, click Conversations.
- On the left is the list of people. Find the adjuster's or the other appraiser's name and click it. If you cannot see it, type their name in the search box above the list. Their thread opens in the middle.
- You are in the right place when you see their name and the email pdrOS just sent.
- Read the email that went.
9. Put the real thing in the real field, only when it is true
A field is not a scratch pad; each one does work. Save after every change, then read the top note.
- In the left menu, click Contacts.
- Click in the search box at the top of the list and type the customer's last name or RO number.
- Click the customer's name in the list. Their contact profile opens. You are in the right place when you see the customer's name at the top left and their texts in the middle.
- On the left side of the contact profile, scroll down to the folder that holds the field and click the folder's name to open it.
- Find the field and do the action for its type (see Reference: every field, by folder).
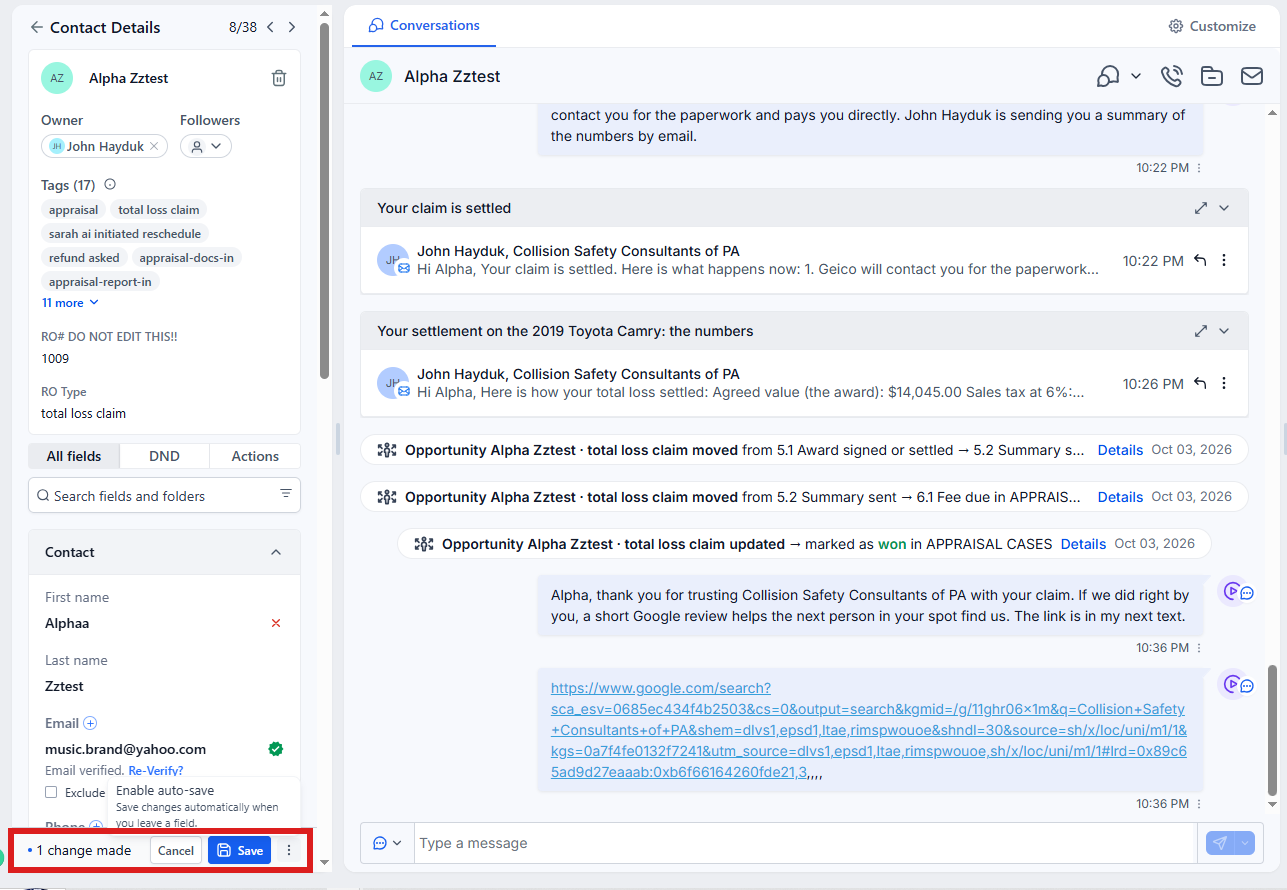
- Click the blue Save button at the bottom of the left side. It appears as soon as you change a field. Nothing happens and nothing is sent until you click it.
- On the far right edge of the contact profile, click the Notes icon (it looks like a pen; hold the mouse over the icons to see their names). The notes open beside it, newest at the top.
- Read the top note. It says what pdrOS did with your change.
If you change a field and no blue Save button appears at the bottom of the left side, stop and tell us. Auto-Save has been switched on, and we switch it back. Until then pick Send switches carefully: they go the moment you choose. Never click Enable auto-save (it is under the three dots next to the blue Save button).
10. If a step does not fit how you work, tell us
Do not force it or work around it. Tell us: in the left menu, click Support, then the orange Support Ticket button. We change the step for every case after; a workaround on your side sends the wrong message to the wrong person.
Three more, for you and Sharon
Mark Complete, always
John and Sharon both: do the step, come back to the Tasks page, click Mark Complete.
- In the left menu, click Tasks. My Tasks opens. You are in the right place when you see the boxes Overdue, Due Today, This Week and Completed at the top.
- Click the task's row. A short preview opens under it.
- Click Open Full View.
- Click the green Mark Complete button at the bottom right of the full view.
- Click Close to go back to the list.
If the task is already gone when you come back, pdrOS closed it because the step happened. Only three tasks close themselves today: ⚠️ Demand not sent, ⚠️ Our report not sent and ⚠️ Counteroffer not sent (they close when the email finally goes). When a task says "Tick this task", it means click Mark Complete.
Sharon's tasks are Sharon's
The CCC1 entry and the customer follow-ups Sarah creates are addressed to her. To give one to someone else:
- In the left menu, click Contacts.
- Click in the search box at the top of the list and type the customer's last name or RO number.
- Click the customer's name in the list. Their contact profile opens. You are in the right place when you see the customer's name at the top left and their texts in the middle.
- On the far right edge of the contact profile, click the Tasks icon (a clipboard with a check mark). The customer's tasks open beside it.
- Click the task's title.
- Click the box under Assignee and pick your name or Sharon's.
- Click Save in the task.
Monday morning
Two looks: the case board for every open case by stage, and the Money out list for every fee still open.
The case board:
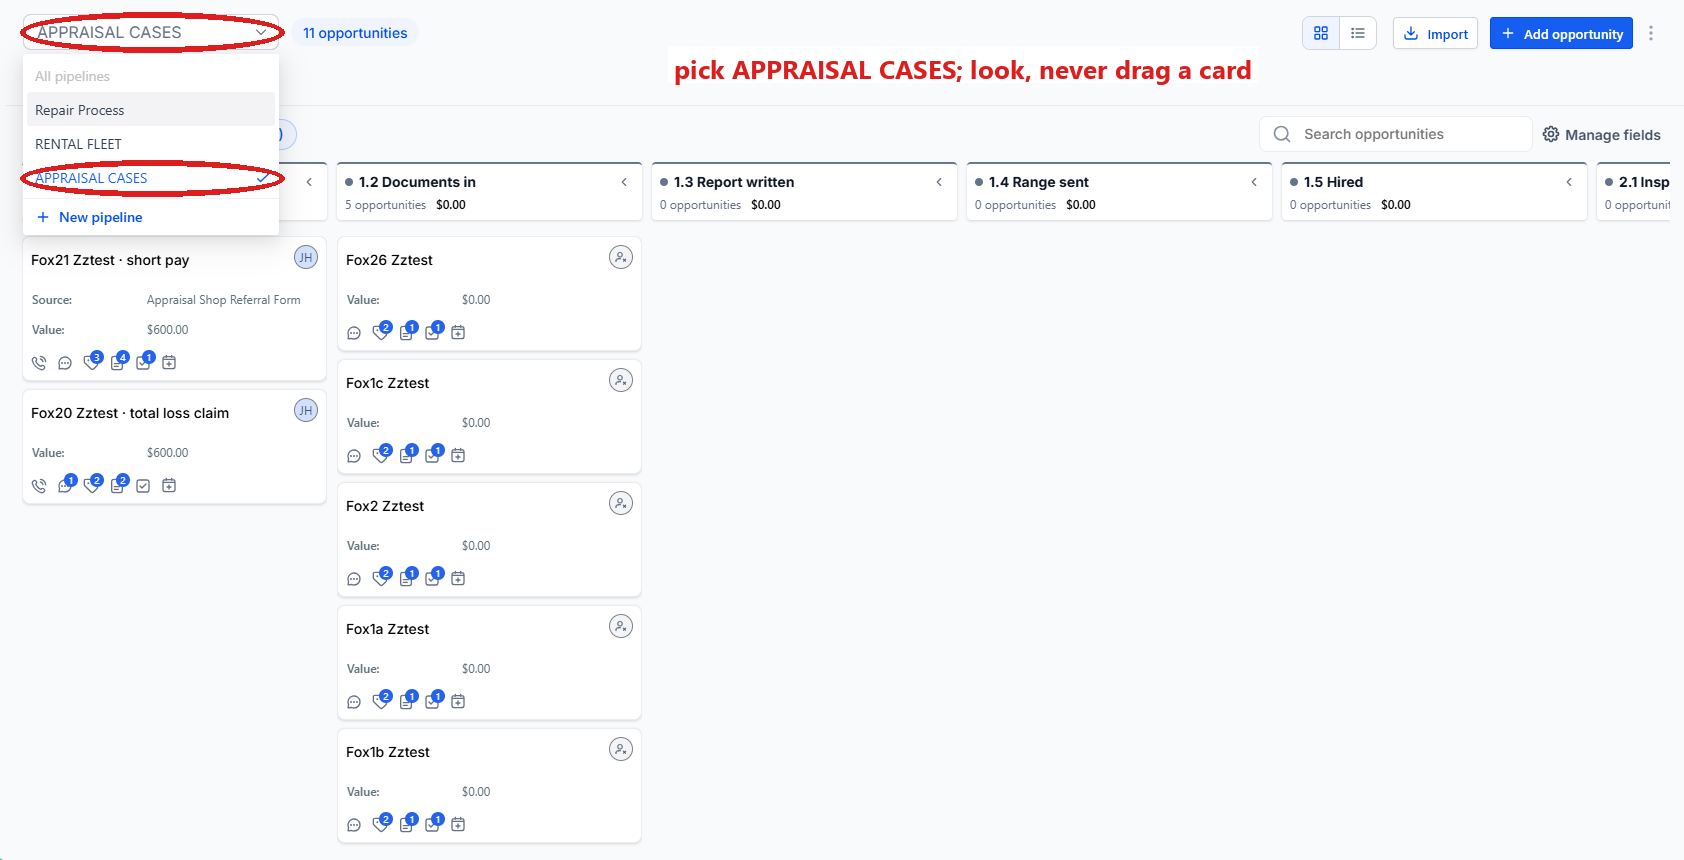
- In the left menu, click Repair Stages.
- At the top left, pick the pipeline APPRAISAL CASES.
- Each open case is a card in the column of its stage, 1.1 to 6.3. Look only: never drag a card; pdrOS moves them.
The Money out list:
- In the left menu, click Contacts.
- Along the top of the list are saved lists; click Money out.
- It shows every hired case whose Fee paid is still No.
Did this page not match what you see? Ask the support chat or open a support ticket. We change the page, not you.